The other day, I was inspired by the movie, “Chronicle” to reproduce the titles shown at the end of the movie in Sony Vegas. It’s a very simple effect yet adds a nice little pop to titles and credits. In a nutshell, you’ll learn how to mask media events to make them transparent so that we can add any image or video behind them. Be sure to watch the video tutorial above to fully understand the power of masking.
In this written tutorial, we’ll mainly focus on how to mask text to reproduce the effect from the movie, “Chronicle“.
Step 1: Add Background Elements
Before we add any text, lets add what we want in the background.

You can use anything you want here like some digital glitch footage or even a still image. I provided a short clip of digital glitch from which you can download below.

[button url=”https://s3.amazonaws.com/robertsproductions/downloads/Glitch_Footage.zip” size=”medium” variation=”green”]Download Digital Glitch (42.9MB)[/button]
[highlight1 variation=”green”]Windows Media Audio/Video file (.wmv) 1280 x 720 42.9MB Length: 00:01:00[/highlight1]
If you added a still image, you can make it move by adding the TV Simulator and Film Grain effects using the following settings.
[tabs_framed] [tab title=”TV Simulator Settings”]
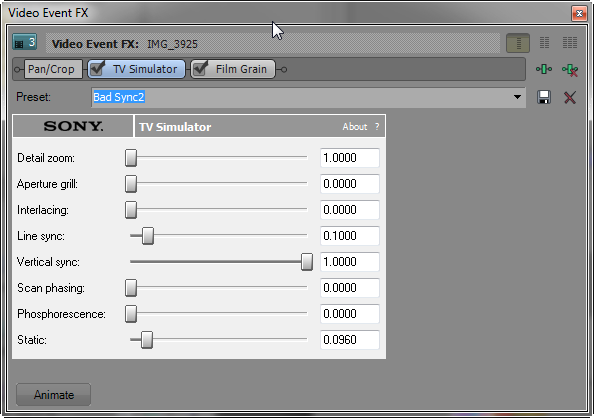
[/tab] [tab title=”Film Grain Settings”]
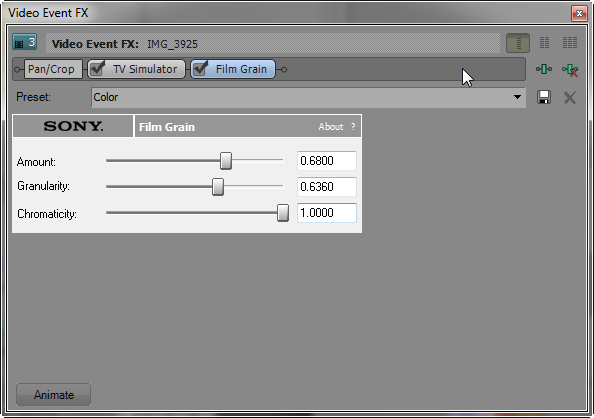
[/tab] [/tabs_framed]
Step 2: Add Text
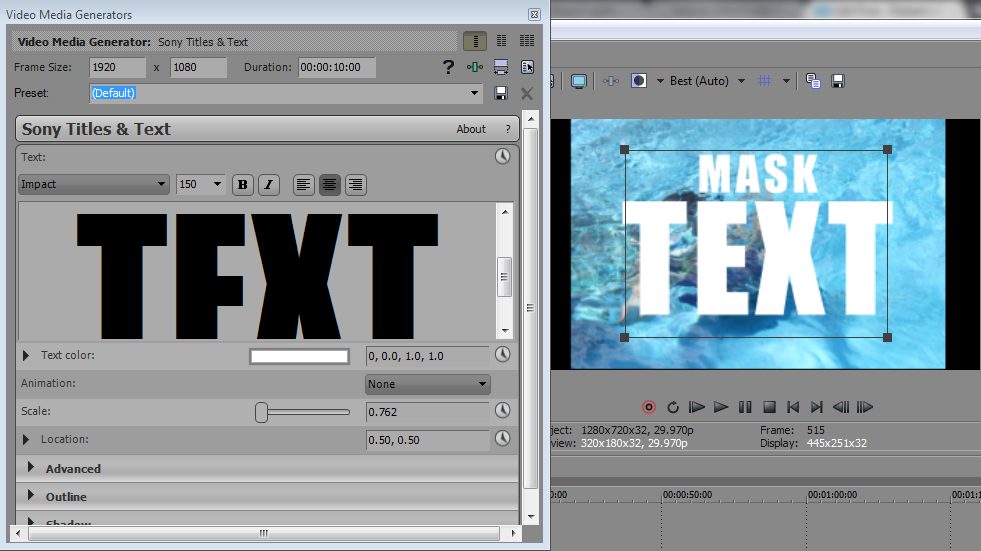
Under Media Generators in Vegas, add your preferred text preset whether it’s the ProType Titler or the standard Titles & Text. I found the standard Titles & Text Default preset worked best since I didn’t need anything too fancy.
Be sure to keep your text “White”.
Step 3: Composite Mode
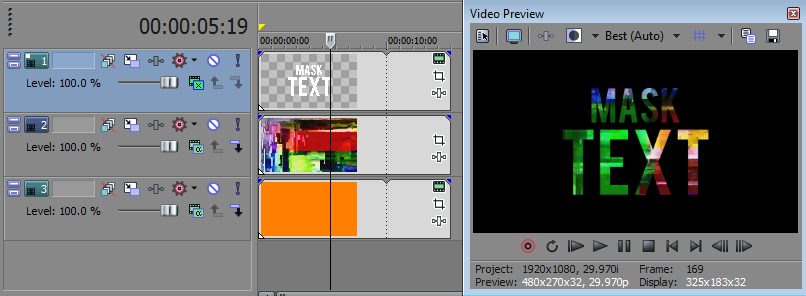
Change the Composite Mode for the track with the text media to, “Multiply (Mask)”. Your text should now be transparent and should show the background footage.
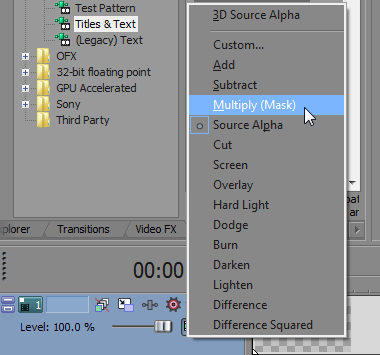
You’re free to animate the text however you’d like. I made it zoom in a bit for each title.
Note: Everything under the Masked track won’t be visible unless there’s footage to mask. Place any other media in a track above the Masked track.
Change Mask Background Color
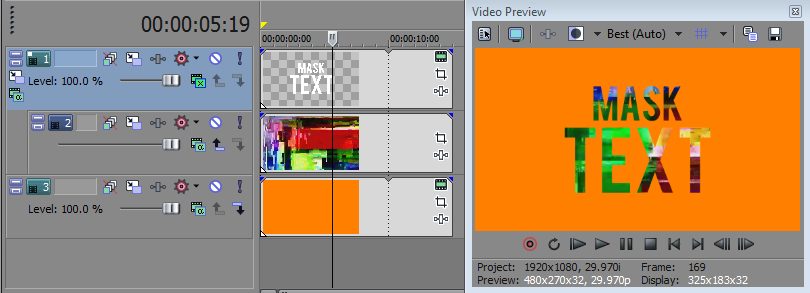
To change the masks background color we need to add some media in an entirely new video track below everything else.
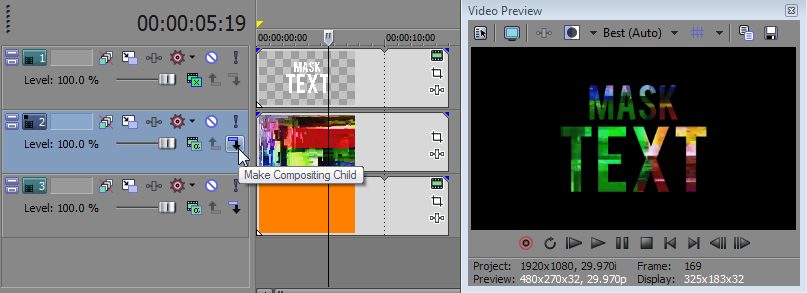
Once added you may not see the color or video clip appear right away. This is because we need to parent the glitch footage with the text. You can do this by clicking Make Compositing Child on the glitch video track.
Now you should be able to see the background color you added.
Alternate Way of Masking Text
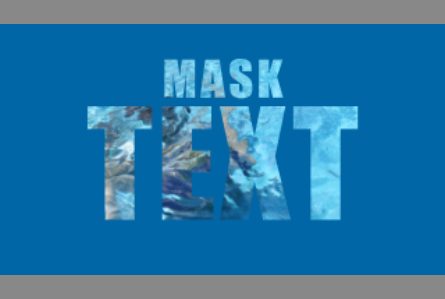
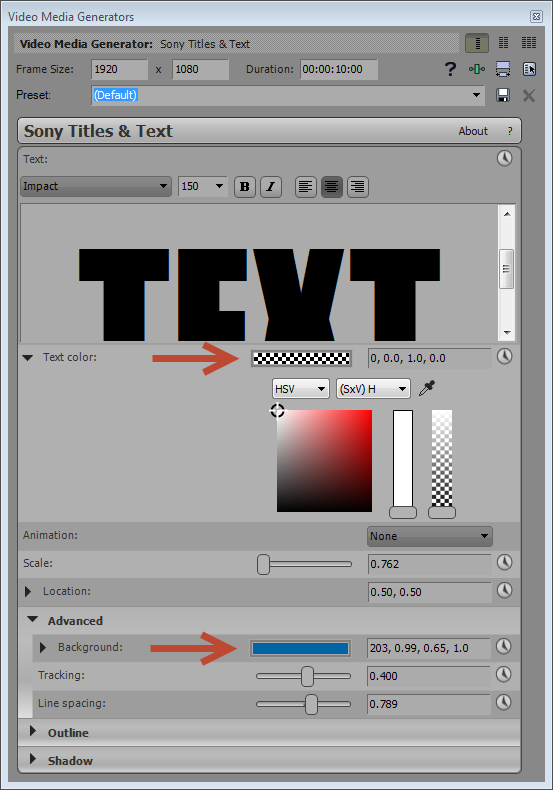
If you want to make the area behind the text a different color, change the text color in the Generated Text Media to transparent and the background to any color of your choice. You don’t need to change the composite mode for this method. Just leave it at, “Source Alpha”.
That’s it! You’ve just learned a few masking techniques in Sony Vegas. You can do this to anything as long as the area to be masked is white.
This written tutorial was mainly focused on masking text. What are some things you’ve done to make text stand out more? Leave your response in the comments below!



Comments