
A little over a year ago, we took a look at adding a logo inside a QR code in Photoshop. However, we left that QR code in its original color, black. Today, we’ll be taking that a step further to show you how to colorize your very own QR code!
Video

There are endless possibilities when it comes to colorizing a QR code. Take a look at some of the designs over at QRLicious for inspiration.
QR Code
We’ll begin by creating our QR code. I used goqr.me to generate mine. QR codes can contain anything from a little message to a link. I just linked it to the website for now. However, if you have a very long link be sure to use a link shortener such as bit.ly to simplify the code a bit.
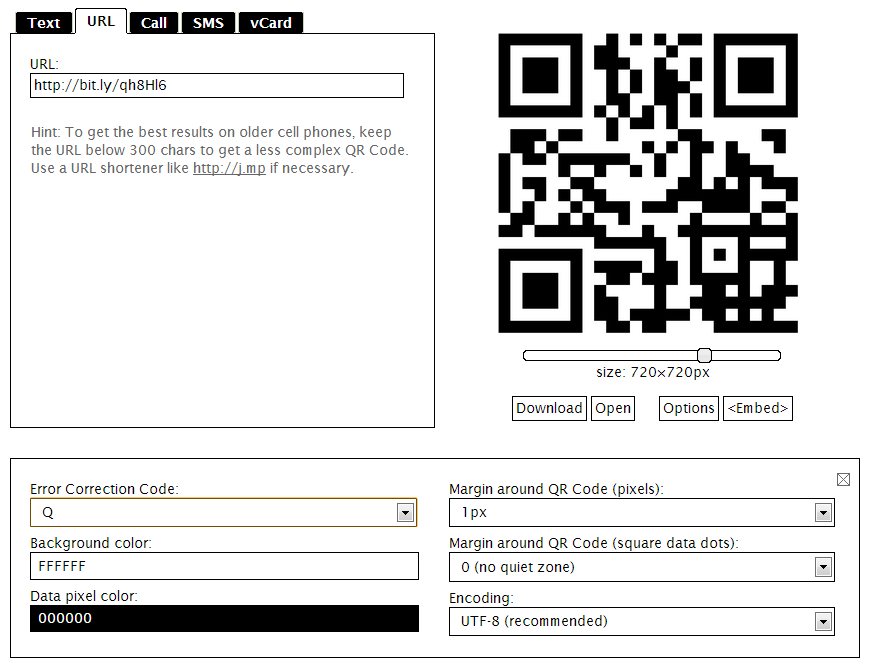
Once complete, you may adjust the size of the code. Click on Options and change the Error Correction Code to “Q” or “H” depending on what works best with your final logo. The Error Correction Code adjust how much of the QR code can be covered with it remaining readable. Download the code to your computer.

Photoshop
Create a new document and adjust the size to fit your needs. I chose 1000 x 1000 px.

I added a radial gradient to the background, but you may leave it white or transparent depending on where you plan on placing the QR code.
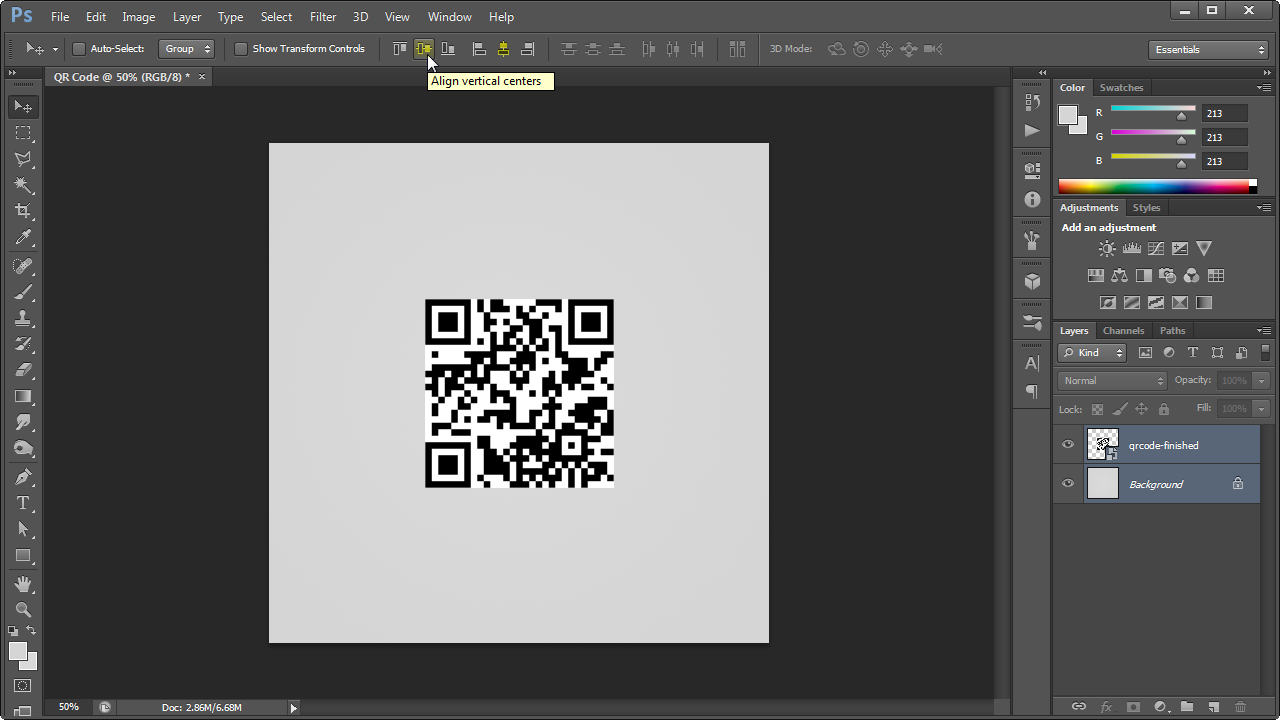
Drag (or File > Place) the QR code file you’ve just downloaded into this new Photoshop document. Adjust the size and center it.

To center, simply select the QR code layer and hold Ctrl to select the background layer. With both the QR code and background layers selected, use the move tool to center everything vertically and horizontally.
We now need to Rasterize the QR code layer since it is currently a Smart Object. To do this, Right-click the QR code layer and choose Rasterize Layer. Now we can delete the white background.

Select > Color Range click the white background within the QR code.

Choose a Fuzziness of around 100. Click OK. Everything that’s white in the image will be selected. With the QR code layer selected, hit Delete. You’ll notice all of the white has been deleted. Now you can hit Ctrl + D or Cmd + D(Mac) to deselect the selection.

All that’s left to do is to stylize the QR code with Layer Styles. Double-click the QR code layer or right-click and choose Blending Options. Here you can add anything from a Bevel & Emboss to a Drop Shadow. Keep in mind that some of these changes may effect the readability of the code so keep testing it while designing.

I added a dark navy blue #031634 to light navy blue #033649 Linear Gradient. Again you can add any of the styles here as long as everything’s still readable by devices.

You can also experiment with the different Artistic filters to stylize the code a bit. And even add a design within the three squares of the code. Make sure it’s still readable!

That’s it! We’ve added some color to the QR code making it much more appealing.
Post your QR code creations in the comments section below!
Comments